January 27, 2016

Walk Alone In Darkness

Hello everyone!
This is one more page on the black journal I created for 2 Crafty Chipboard.


I like making pages with quotes I love in my black journal.
For this one I used some small butterflies of the Butterflies set to represent the crowd and one big Marianne's Butterfly to be main character of the quote.
I also used some pieces of the Circle Lace Panel - I think it matches so beautifully with the butterflies.


First I glued all the chipboard pieces on the page and then I painted them with black and white Gesso to create a light and dark shading all over the page...


For the small butterflies I used ColourArte sprays to color them and Lindy's Stamp Gang embossing powders with stamps on them and also on the background to embody them on it.


For the big butterfly I used iridescent silks to color it. They really make the perfect paint for black surface. I also used a White UniBall pen to make some doodling on it and also write the quote.

2Crafty chipboard Used

Butterflies
Marianne's Butterflies
Circle Lace Panel

Butterflies (unit of 3)  Marianne's Butterflies (unit of 3)   Circle Lace Panel (units of 3)


Thank you for visiting!
Have a lovely crafty day!
xxx
Athanasia

January 25, 2016

Grow like a weed

 Hello Mixed Media friends!
Today I'm hosting the Mixed Media Place blog with a journal page!

 I love making pages with quotes or thoughts in my journal. I found this beautiful sentence in the 7 Dots Studio 'Nature Walk' collection GROW LIKE A WEED and that was my inspiration for this page.
I made a collage with scraps from a paper of the same collection and sealed them with Clear Gesso. Then I used some green and blue shades sprays to paint the background with a paintbrush. 

When it was dry  I decided to make a couple of circles using the cup of a Mica Powder as a template and a black permanent pen. I also made a smaller one and painted them all with blue shades of gelatos. I let it dry and then I used some stamps to create more interest on the background. I also used the Heavy White Gesso and a stencil here and there for more texture.

In order to alter the chipboard flower I used Heavy White Gesso to paint it and Lindy's Stamp Gang white spray to make it more shiny. When it was dry I spread some Black Glass Glitter on some spots and glued it with 3D Gloss Gel. I really like how it turned out! 

Then, I glued down the flower with 3D Gloss Gel and spread some Mica Powder (Bottle Green and Frozen Lake) here and there with a dry brush. I sprayed some water on these spots and let the magic spread all over the composition! After that, I used again the 3D Gloss Gel to glue some fabric and the sticker with the sentence. 

 My final touches are always some splashes with White and Black Gesso.
***buy all products used for these project at Mixed Media Place online store
***buy a journal like this at  The Journal Shop

>>>

With this page I'm entering -again :) - the Berry71Blue challenge
 with this amazing color pallet.


>>>

Have a lovely crafty day!
xxx

January 22, 2016

'You are Unique' layout for Finnabair CT

Hello dear friends! 
Today I'm hosting Finnabair's blog with a layout and a video tutorial!


I found this amazing photo on Pinterest and thought it would be perfect to express some thoughts and personal believes: How awesome is to be me! To be different from the rest of the crowd and feel good about it! 
So, I created a layout full of colors, contrast, little messages, butterflies and a really beautiful elephant :)

For this project I used a lot of butterfly stamps in different shapes - you can find them in Rust&Dust and Dream On sets. I decided to cut out my stamped butterflies and turn them into 3D embellishments to decorate the composition.
I also used a Lace stencil in a different way, 2 shades of Mica Powder (Green and Purple), Heavy White Gessoand of course a lot of Glass Beads and Glass Glitter mixed with 3D Gloss Gel.

You can see the whole process in my video below.

Here are some details...


I hope you will find my video inspiring and get some new ideas!

>>>

To create this page I got inspired by this amazing color pallet at  Berry71Blue...

...and followed this sketch from Art Sandbox

>>>

Thank you for visiting!
Have a lovely crafty day!
xxx
Athanasia

January 17, 2016

art journal page with video tutorial

Happy Sunday everyone! 
Today I'm hosting the ColourArte blog with a journal page and video tutorial.

For this project I used:

ColourArte products:
Other products:
  • 2Crafty chipboard
  • White gesso
  • 3D Gloss Gel
  • Finnabair glass beads and glitter
  • stencil
  • black permanent pen
  • 7Dots Studio scraps
  • black embossing powder
  • stamps
Here are some details...


...and now you can watch the whole process.
I hope you will enjoy watching it :)


 ***you can buy a journal like this at The Journal Shop

Thank you for visiting,
have a lovely crafty day!

January 11, 2016

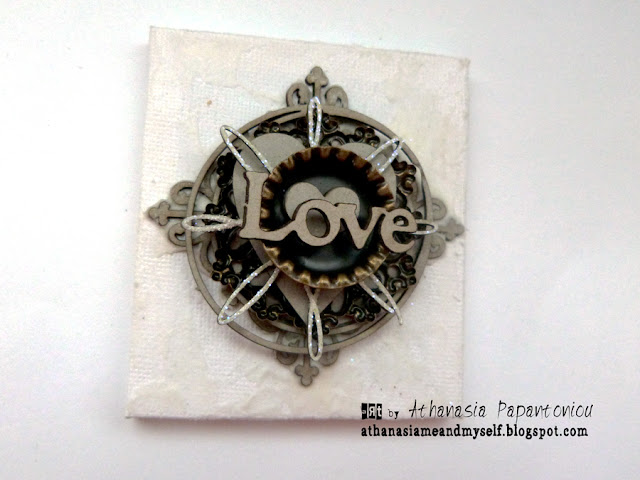
Tiny canvas 'LOVE'

Hello dear friends!
Today I'm sharing a tiny canvas I created for 2 Crafty Chipboard
for a friend of mine as a present.

It only measures 8x7 cm and I really love how small and cute it looks.
Even thought it is so small I managed to use 7 chipboard pieces and 2 metal pieces  to create a dimensional cluster like a pyramid!
This is how it looked before I altered the chipboards and paint it all.

In order to alter the chipboard pieces I used H2Os watercolors and silks by ColourArte and black embossing powder by Lindy's Stamp Gang.

First I created a mixed media background and then I started gluing all the embellishments with 3D Gloss Gel.

I really love how this tine mixed media pyramid looks!
Here are some closeups with details...


2Crafty chipboard Used

ATC Tiny Hearts and Stars
ATC Words 1
Spiral Snowflakes
Fluer Arrows
Hearts
Card Word Circles (I used only the circle)
6'' Circle Revolution Frames ( I used the center of the frame)

ATC Tiny Hearts & Stars  (units of 3)  Card Word Circles - Sentiments (unit of 3) 6" Circle Revolution Frames (units of 3)
 ATC Words 1 (units of 3)

   Spiral Snowflakes (unit of 3)  Hearts (units of 3) Fluer Arrows (units of 3)


>>>

With project I'm entering the 13 Arts 'Shine' challenge.
I used Shimmering H2O watercolors, Glitter and Glass Glitter on the chipboard pieces and also on the background.


>>>

Thank you for visiting!
Have a lovely crafty day!
xxx
Athanasia


January 2, 2016

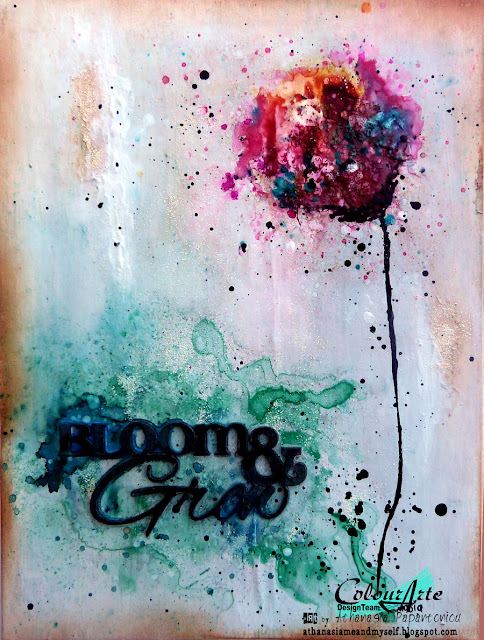
Bloom and Grow

Hello everyone!
Today I'm hosting the ColourArte blog with a small canvas I created for my art wall.


After quite a few Christmas projects, today I'm sharing a small canvas I created for my art wall.
For this project I used:
ColourArte products:


  • H2Os Shimmering Watercolors: Black Emerald, Vanilla Bean, Playful Peony, Summer Breeze, Lemondrop, Apple Blossom, Midori Melon, African Jade, Mistique
  • Radiant Rains Misters: Sunburst, Ocean Wave, Apple Blossom, Teal Zirgon
  • Primary Elements: Blue Grass


  • Other Products:
    • 2Crafty Chipboard sentence 
    • butter embossing powder
    • Finnabair Glass Glitter
    • 3D Gloss Gel
    • Heavy White Gesso
    • Vintage Photo distress ink
    • glue

    First I applied White Gesso all over the surface. Before it was dry, I made some splashes with all the H2Os and blended them with the White Gesso with my paintbrush to create a soft pastel background. I let it dry.

    Then I spread some butter embossing powder here and there and melted it with the heat gun.

    Next step was to glue the chipboard sentence. I spread some water and with the paintbrush I applied the Apple Blossom H2O. I really love this watercolor effect! I also spread some Blue Grass Primary Element and sprayed water to liquefy it.

     To create the flower I sprayed with the Radiant Rain Misters and made a lot of splashes with all the colors of H2Os I listed above. I also glued with the 3D Gloss Gel some glass glitter in the middle of the flower.

    In order to create the stalk of the flower I used the Black Emerald with a fine brush. I also made some splashes with it.


    My final step was to distress the edges with the Vintage Photo distress ink.


    I hope you got some inspiration and ideas on how to create a watercolor look on your project.
    Thank you for visiting,
    have a lovely crafty day!