Showing posts with label love. Show all posts

February 14, 2016

You+Me=Big Love

Happy Valentine's Day everyone! 
Today I'm hosting the 2Crafty Chipboard blog, so I wanted to make something with a LOVE mood :)
This layout represents a big love, indestructible in time.


First thing I do to start building a layout is to place the photo and the basic elements and these are the chipboard pieces.
Here is how my page looked before adding more embellishments and painting...

 I used three Polaroid Assortment Frames which I absolutely adore! They look so beautiful in the clusters and they come in different sizes, how cool is that?. 
All chipboard pieces where inspiration of this layout, even the small Asst Arrow. I love how it stands there and points to the main composition.

To paint all the chipboard pieces I used silks and H2Os Twinkling watercolors.
It is really a quick process to paint all these before gluing them down - the chipboard sucks the color and they dry in no time!


For the cluster in the picture bellow I used four different chipboard pieces: two Polaroid Assortment Frames, the word Precious and a small Hedgehog (how cute is that??? ) 
I love how they look one above the other!


2Crafty Chipboards Used:

Polaroid Assortment Frames

Flower Medallions

Ribbon Ties

Hedgehogs

Precious

  Loopy FontAsst Arrows


 Precious - Loopy Font (unit of 3)   Flower Medallions (unit of 3)    Hedgehogs (unit of 3)

 Ribbon Ties (unit of 3)   Polaroid Assortment Frames (unit of 3) Asst Arrows  (units of 3)

...

With this project I'm entering the challenge at ScrapMemory with this beautiful sketch


....and the 'Hearts' challenge at Art Sandbox

...


Thank you for visiting
Have a lovely crafty day! 

xxx
Athanasia 


January 11, 2016

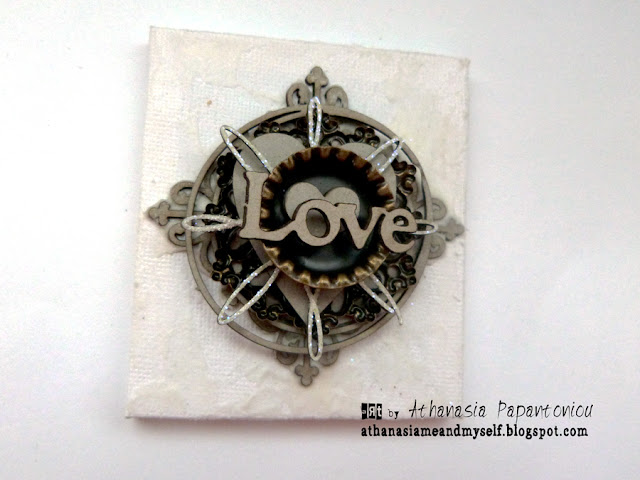
Tiny canvas 'LOVE'

Hello dear friends!
Today I'm sharing a tiny canvas I created for 2 Crafty Chipboard
for a friend of mine as a present.

It only measures 8x7 cm and I really love how small and cute it looks.
Even thought it is so small I managed to use 7 chipboard pieces and 2 metal pieces  to create a dimensional cluster like a pyramid!
This is how it looked before I altered the chipboards and paint it all.

In order to alter the chipboard pieces I used H2Os watercolors and silks by ColourArte and black embossing powder by Lindy's Stamp Gang.

First I created a mixed media background and then I started gluing all the embellishments with 3D Gloss Gel.

I really love how this tine mixed media pyramid looks!
Here are some closeups with details...


2Crafty chipboard Used

ATC Tiny Hearts and Stars
ATC Words 1
Spiral Snowflakes
Fluer Arrows
Hearts
Card Word Circles (I used only the circle)
6'' Circle Revolution Frames ( I used the center of the frame)

ATC Tiny Hearts & Stars  (units of 3)  Card Word Circles - Sentiments (unit of 3) 6" Circle Revolution Frames (units of 3)
 ATC Words 1 (units of 3)

   Spiral Snowflakes (unit of 3)  Hearts (units of 3) Fluer Arrows (units of 3)


>>>

With project I'm entering the 13 Arts 'Shine' challenge.
I used Shimmering H2O watercolors, Glitter and Glass Glitter on the chipboard pieces and also on the background.


>>>

Thank you for visiting!
Have a lovely crafty day!
xxx
Athanasia


December 24, 2015

Christmas wishes from Finnabair CT

Merry Christmas everyone!
Τhe whole Finnabair Creative Team created their personal artistic Christmas wishes for all of you...
My wish to all of you is LOVE!


You can visit Finnabair's blog to see all the amazing projects team created.
We hope all these wishes will come true for you. Enjoy and feel inspired! 

Here are some details of my project. It's full of Finnabair products: White Heavy Gesso, 3D Gloss Gel, Glass beads, glitter, 'love' button, a piece of resist canvas with which I made a pocket on the bear's belly, star brads. 
The word LOVE is by 2Crafty Chipboard.


Sending warmest hugs for the Christmas Time!

xxx
Athanasia
September 24, 2015

The sound of silence

Hello dear friends!
Today I'm sharing my second project for this month I created for  2Crafty Chipboard blog.


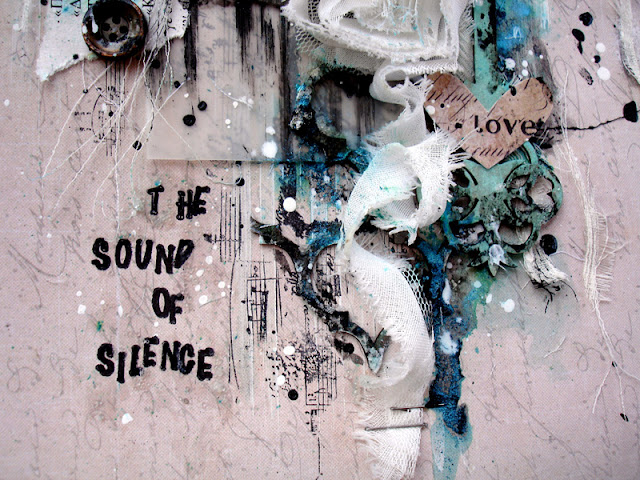
'The music is not in the notes, but in the silence between' - W.A.Mozart
This is an amazing quote I always have in mind when I'm playing the piano.
As a musician I love making projects about music, so I decided to make one with this favorite quote of mine. 


For my page I used the word "love" as the main title, which I cut from the love border.
I really like the calligraphy style of it and I think it has the perfect size for the tittle.
I altered it with black embossing powder and placed it vertically to much the whole vertically flow of the page.

 I also used some pieces from the 6x6 'Moroccan Panel' in order to give texture and interest to the background. I absolutely love this design. It matches with any kind of style and it is very easy to cut it in pieces and use them on your projects. I used black and white gesso and silks to alter them.

This big key from the 'Vintage Keys' set was the perfect embellishment to complete my composition, because it represents the key of perfection in what has to do with music.
I painted it with African Jade silk, my favorite color, and a little bit of black and white gesso.

***silks and primary elements by ColourArte
***embossing powders by Lindy's Stamp Gang

2Crafty Chipboard products used on this project:
LOVE border
Vintage Keys set
6x6 'Moroccan Panel

Love Border (unit of 3)
Moroccan Panel (units of 3)Vintage Keys (unit of 3)


Have a lovely crafty day!


May 14, 2015

love bugs

Hello everyone!
 Today I want to share a canvas I created about love bugs for Mixed Media Place
I really like bugs, I think they are very cute and I love... love! So, my thought was to combine these two ideas in one project:


For this canvas I used quite a few embellishments, actually one chipboard piece and two die cuts from the 7 Dots Studio Soulmates collection! 
In order to create the background of the composition, I used the light paste with Finnabair's 'Weaving' stencil and some Lindy's Stamps Gang sprays in color shades that match the photo's colors. I also did some stamping with several stamps here and there...

To create the clusters I used the wooden sticks which come with the canvas - I haven't figured out yet how am I supposed to use them, so I had this idea to glue them on the canvas :) I also glued on them some torn tiny pieces of old pages and little pieces of canvas paper and used some gold thread. 

One thing I enjoyed was cutting out the bug. I printed the same photo twice and glue the bug on the second photo. I really like this effect - it's like a real one standing on the photo and looking at it's fellow! :)


For the tittle I used one of the 7 Dots Studio dies. As I didn't have any frame, I decided to make one of my own with gold wire. I wrapped some of it around the sticker and glued it down... I love the result and definitely am going to do it again in another project!


 As a final touch, I used my favorite ever 'Blue Grass' from Primary Elements on some spots to highlight them.

***You can find all the supplies used on this project at Mixed Media Place store
and their links on this post.

>>>

With this project I'm playing at
StampsForCrafts insect challenge


>>>

I hope you liked today's project and got some new ideas!
Have a lovely day!