This month starts with a You Tube Hop inspired by Spring :)
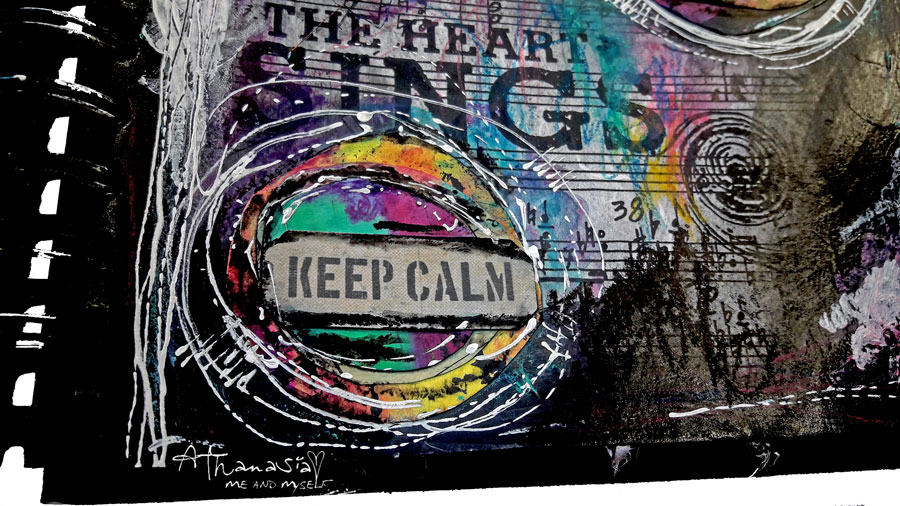
I created a spread in my mini art journal
My page is inspired by this moodboard the team created for the HOP.
You can watch the proccess on how I created my page on my You Tube channel
Our amazing sponsors for this Hop are...
Visible Image £20 gift certificate
FabScraps 2 times 5 stencils
7 Dots Studio - collection kit
WOW 2 times $15 or £15
Joggles 2 times $25 gift certificate
My rusty Crown $25 gift certificate US only
AB studio by Aga Baraniak prize pack stencils
Rubber Dance Stamps €25 stamp grab bag
✪ Hop Rules ✪
Like each video
Leave a comment on each video (don’t forget to let us know what country you’re from too)
Subscribe to all channels that join this hop to have a chance on winning a prize
Thanks for stopping by and Good Luck!
The giveaway will be open to join until March 10th 2019
Winners will be announced on Monday March 11th in the first comment on all videos and in reply to the winners comments.
So be sure to check back on the videos.
The winners have 1 week to claim their prize.
Wanderlust is in its fourth year, and offers weekly, full length classes which are both high quality and original, aimed at beginners right through to the more experienced.
All videos from Wanderlust 2019 will be streamable to view on our website with a life-time access - so you can do the class in your own pace and just perfect timing!!!
Click this link to join us and get messy with some paints!
It has been a really long time since my last post,
but today I'm back with a new mini art journal page, with a VIDEO tutorial :)
I was invited to participate in a YOU TUBE Art Journaling HOP
with some of the most amazing and talented ladies.
What a honor, woo hoo!
Visit my channel to find out on how to participate in the fun and win amazing prizes by our sponsors!
Just make sure to leave a comment and subscribe ;)
Here is my video...
>>> supplies list <<<
- Gel Press printing plate
- ColourArte Vivid acrylic paint: Jasmine, African Jade, Silver
- ColourArte Primary Elements: Go Navy, Fresh Oregano, Sunflower, Wintermist Grey
- ColourArte H2Os: Meridian Blue, Tahitian, african Jade, Siam White
- Donna Downey stencil 'la rose'
- Prima Art Basics Modeling Paste
- Prima Art Basics Heavy Gesso White
- Prima 3D Gloss Gel
- Prima clear stamps by Finnabair
- Archival Ink Black
- 7 Dots Studio Element Stickers 'Verano Azul'
- 13 Arts clear glass powder
- thread
- black permanent pen
...
>>> Blog Hop Sponsors <<<
- Joggles.com
- 7 Dots Studio
- 49 and market
- The Crafters Workshop
- Snip-Art
- UmWowStudio
- Viva Las Vegas Stamps
Hello dear friends and Happy New Year!!!
My first post for this year is for Finnabair CT...
The dragonfly, in almost every part of the world symbolizes change and change in the perspective of self realization. It is that kind of change that has its source in mental and emotional maturity and the understanding of the deeper meaning of life.
So, what do I expect from 2017? Lots of changes and lots of dragonflies in my life.
I wish all of you dear friends to havethis year lots and lots amazing artful moments to fulfill your life and why not: lots of dragonflies :)
My first project for this year is making the cover of my black journal and what would be more perfect to impress a dragonfly, so to remind me this year's expectations every time I hold it in my hands.
and psssst! I also have a little secret to share... after I was done with the cover I decided to get my first tattoo: a dragonfly on the side of the wrist of my right hand!
So....let's get started with the project!
As my journal was already black, I started with a nice coat of Heavy Black Gesso to prime the cover.
After it was dry, I glued the Mechanicals parts I used for the body of the dragonfly with Heavy Body Gel and covered them with Black Gesso.
Then I placed a sketch I made on a piece of paper on the cover to shape the dragonfly, but here is the trick: I used a pin to scratch the canvas cover, than a pencil to draw the lines. This way I created an interesting texture, a 'destroyed' base all mixed media artists would love to work on ;)
Next step was to choose my paints. Well, with no second thought I grabbed my Art Alchemy Opal Magic Paints, the perfect acrylics for any black surface. They dry permanent and I loooove the amazing two-tone iridescent effect they give on dark and light backgrounds. Ιn order to reinforce this effect, I painted some spots of the wings white with the Heavy White Gesso. You will see the whole process in my video below.
After the Opal Magic Paints where dry, I used again the White Gesso to make lots of splashes.
To give even more interest on the background of the wings, I used the Clear Crackle Paste as my final touch. I let it dry overnight to get the best results.
For the tittle I wanted something simple and small, not to distract the attention from the dragonfly, so I wrote by hand the word ART with Heavy White Gesso and a black permanent pen.
Now it is time for my video. I hope you will enjoy it and get inspired. :)
*Scroll down on this post to find a full products list
Today I'm presenting a special project I created for Finnabair CT,
doing wonders with Art Alchemy paints and an unexpected 'art supply' on my black journal.
I hadn't made any page in my black journal for a while and I really missed working on black background!
Of course I went for something colorful as usual, with a vintage touch and a photo from the Ephemera Vintage Collectibles helped me a lot to create this special 'olden days' atmosphere.
As I wanted to mix modern and vintage styles, I decided to create a peeled paint effect background.
First thing to do was to seal my page with the Clear Gesso.
In order to create the background I used my favorite shades of Art Alchemy paints and...Vaseline! That's right! Vaseline is oil based, so it resists the water based paints and creates the peeled effect. It is a very pleasant technique, you will see the whole fun process in my video below.
When my acrylic paints were dry, I used the Clear Crackle Paste (which is lately turning out to be my fave product) right onto the paints and let it dry naturally to get perfect results. I absolutely love the final look!
To embellish my page I used 7 Dots Studio stickers and some handmade butterflies I created with the 'Don't forget to fly'cling stamps set and black embossing powder.
I also used a couple of chipboard pieces which I painted white with Heavy White Gesso.
Last thing to do was to doodle on the photo with a black pen and make some splashes with the Art Alchemy paints and White Gesso.
Here is my video with the whole process. I hope you will enjoy it and get inspired. :)
*Scroll down on this post to find a full products list
This is my new journal page I created forFinnabair CT.
I was keeping the canvas sheet of my Denim Journal since I had the journal and I was waiting for the big idea to come - maybe something special or even better - something different that usual...
Even though it has been a really long time since I created something in vintage style, I wasn't going for this style. I had in mind something colorful, as always, but during the process I decided to keep it in natural shades.
I started with cutting and tearing the canvas sheet and when I was done with the destroying procedure -lol- I used the Sculpture Medium to secure the torn pieces.
Here is how it looked before I added all the mediums and embellishments.
When it was dry I used two shades of homemade sprays with Mica Powders, Rust and Purple, and sprayed them all over the page.
Then I cut a sheet of watercolor paper in the same size as the canvas sheet as I needed to cover the whole space under the holes.
I used Modeling paste with the Lace stencil to create texture and stamps with black ink.
To embellish my journal page I used a vintage photo from the Ephemera - Vintage Collectibles, a Mechanical Flower, Copper and Bronze Micro Beads, wire, Art Stones and Mini art stones, Screw Brads, Melange Pebbles, wire and a couple of chipboard pieces. I glued everything with 3D Matte Gel.
To paint my journal I used two shades of Art Alchemy Opal Magic Paints: Rose Gold and Violet Gold.
I also used the Rust Pastes on the metal embellishments to make the project look even more vintage.
Finnaly I used the Black Gesso to paint the chipboard tittle and made some splashes here and there to add a little bit of contrast.
Here is my video with all the process. I hope you will enjoy it :)
*Scroll down on this post to find a full products list