Showing posts with label art alchemy. Show all posts

June 25, 2017

Memory - junk album

Hello dear friends!
I' m hosting the Finnabair blog with my new project, a Junk Album, 
with a video on how I made it.

Last week my good friend Helen visited me to hang around and play with the new products Finnabair released a few weeks ago.
We ended up making a junk journal each and painting the cover with the new Impasto Paints.
I really love their heavy creamy consistency and the rich colors that make them the perfect choice for any kind of project!
And...psssst.... they are matte!!! The main reason for me to put them in the first place of my Favorite  Paints list. :)


The base of my cover was a simple paper bag so I had to seal it and protect it from the paints.

I used the Clear Gesso because I wanted to keep the natural colors of the envelope.

Then I used a roller to paint with the Impasto Paints. I painted here and there with Dark Chocolate, Jade, Bottle Green, Crimpson and Lemon Peel - you will find all the links below.

Then I used the Snow White paint to blend the colors with the white background.

Next step was to create texture to the background.
I used the 3D Gloss Gel with the Bubbles stencil. I used a heat gun to dry it all and as I wanted even more texture, I didn't stop heating it until I saw some real bubbles which were created by the high temperature. :)

To embellish the cover I used a photo from the Ephemera Vintage Collectibles collection which I cut out with my scissors and glued it down with the Soft Matte Gel.
Then I used the new Mega Art Stones. I glued with the 3D Gloss Gel only a few of them because they are really mega! I abolutely adore them!
I also used some thread and a chipboard word 'Memory' which I painted white with the Snow White Impasto Paint.
As some final touches, I used a graphite pencil to doodle around and the Pitch Black Impasto Paint to make some splashes like I usually do. :)

You will see in my video below how me and my craft buddy played with the Impasto paints and had lots of fun.


I hope you felt inspired to make your own junk album with your friends!

It is always so nice and fun to spend time with good friends and create together, don't you think?

Until next time -

have fun and create in good company!

xxx
Athanasia


May 22, 2017

Break Out in Song - art journal page

Hello dear friends!
I'm back with a new art journal page I created for Finnabair CT.

My last art journal page is already placed in my Denim Journal and makes me really happy when I open it and the first thing I see are these beautiful colors.I always love to incorporate a variety of colors on my pages. It just cheers me up and makes my day every time. :)
The Art Alchemy acrylic paints come in such yummy shades and I can't resist to use almost all of them in my projects.
So, after I used the Heavy White Gesso to prime the page, I started by painting with my favorite colors using a paint roller.
When they were dry I used the 'Bubbles' stencil to create some round shapes here and there with the Rich Turquoise paint.


Then I grabed a black permanent pen and wrote the lyrics of my favorite song 'Other People' by LP.

I used Clear Gesso to seal the text, just to be sure that it won't come off in the next steps.


After that, I painted with some White Gesso here and there to blend the colors and the text with the white background.

I also used the black pen to add some doodling here and there...

Then I dealed with the bubbles. I wanted some spark in there and the Sparks Acrylic Paints were perfect for this effect.

I used three of my favorite shades: Raven BlackIris Potion and Mermaid Sparkle.
I also used the Mystic Turquoise and Amethyst Magic Antique Brilliance Waxes to achieve an even more shiny result. I realy love how they turned out.


I used a small tag to write down a quote I found on Pinterest and decorated it with these cute Mechanicals Wings, a button I had in my stash and thread in different colors.

Last thing to do was to make some splashes with the Black Gesso to add a bit of contrast.

You can see in my video below how I played with all these delicious colors and how I build this page.

***visit this post for full list of supplies.

Thank you for visiting and I hope my music inspired project will give you some creative ideas :)!

I wish you all a happy crafty day!

xxx
Athanasia

January 31, 2017

My Black Journal - textured background for Donna Downey Artist Gang

Hello everyone!
I'm so excited to share my first project for Donna Downey Artist Gang!!!
Here is my new page in my black journal.

I hope you will like it and you will enjoy the process in my video below :)
Don't forget to leave me a comment, 
as well give me thumbs up and subscribe on my You Tube channel  :)


Supplies from the Donna Downey store:
https://www.donnadowney.com/collections/daniel-smith-watercolors/products/daniel-smith-extra-fine-watercolor-15ml-tube-quinacridone-pink
https://www.donnadowney.com/collections/daniel-smith-watercolors/products/daniel-smith-transparent-pyrrol-orange
https://www.donnadowney.com/collections/daniel-smith-watercolors/products/daniel-smith-extra-fine-watercolor-15ml-tube-amazonite-genuine
https://www.donnadowney.com/collections/daniel-smith-watercolors/products/daniel-smith-extra-fine-watercolor-15ml-tube-buff-titanium
https://www.donnadowney.com/collections/stamps/products/you-are-important-stamp-set


Thank you for visiting!
Have a lovely crafty day!

xxx
Athanasia


December 10, 2016

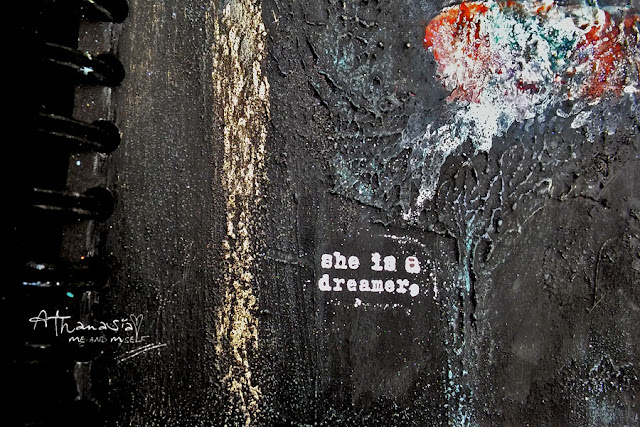
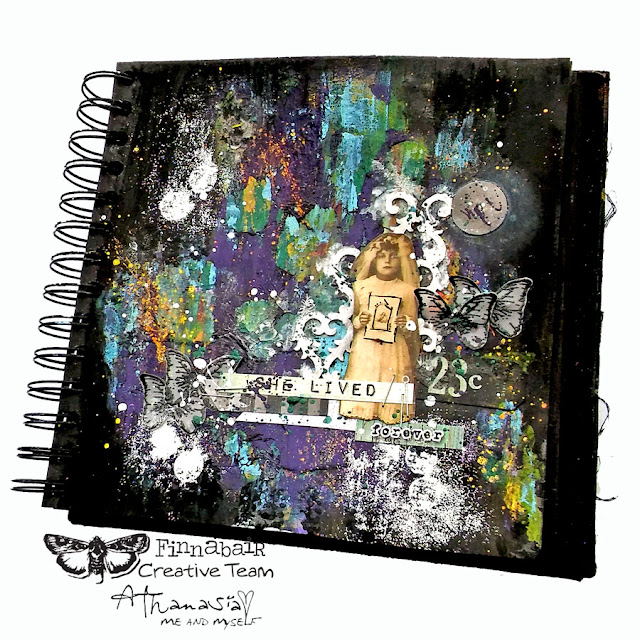
My Black journal - She lived forever

 Hello dear friends!
Today I'm presenting a special project I created for Finnabair CT,
doing wonders with Art Alchemy paints and an unexpected 'art supply' on my black journal.
I hadn't made any page in my black journal for a while and I really missed working on black background!
Of course I went for something colorful as usual, with a vintage touch and a photo from the Ephemera Vintage Collectibles helped me a lot to create this special 'olden days' atmosphere.


As I wanted to mix modern and vintage styles, I decided to create a peeled paint effect background.
First thing to do was to seal my page with the Clear Gesso.
In order to create the background I used my favorite shades of Art Alchemy paints and...Vaseline! That's right! Vaseline is oil based, so it resists the water based paints and creates the peeled effect. It is a very pleasant technique, you will see the whole fun process in my video below.


When my acrylic paints were dry, I used the Clear Crackle Paste (which is lately turning out to be my fave product) right onto the paints and let it dry naturally to get perfect results. I absolutely love the final look!

To embellish my page I used 7 Dots Studio stickers and some handmade butterflies I created with the 'Don't forget to fly' cling stamps set and black embossing powder.
I also used a couple of chipboard pieces which I painted white with Heavy White Gesso.

Last thing to do was to doodle on the photo with a black pen and make some splashes with the Art Alchemy paints and White Gesso.

Here is my video with the whole process. I hope you will enjoy it and get inspired. :)


*Scroll down on this post to find a full products list


Thank you for visiting
have a lovely crafty day!
xxx
Athanasia

November 11, 2016

Hold on Time - art journal page

Hello dear friends!
This is my new journal page I created for Finnabair CT.

I was keeping the canvas sheet of my Denim Journal since I had the journal and I was waiting for the big idea to come - maybe something special or even better - something different that usual...
Even though it has been a really long time since I created something in vintage style, I wasn't going for this style. I had in mind something colorful, as always, but during the process I decided to keep it in natural shades.

I started with cutting and tearing the canvas sheet and when I was done with the destroying procedure  -lol- I used the Sculpture Medium to secure the torn pieces.
 Here is how it looked before I added all the mediums and embellishments.

 When it was dry I used two shades of homemade sprays with Mica Powders, Rust and Purple, and sprayed them all over the page.

Then I cut a sheet of watercolor paper in the same size as the canvas sheet as I needed to cover the whole space under the holes.
I used Modeling paste with the Lace stencil to create texture and stamps with black ink.

To embellish my journal page I used a vintage photo from the Ephemera - Vintage Collectibles, a Mechanical Flower, Copper and Bronze Micro Beads, wire, Art Stones and Mini art stones, Screw Brads, Melange Pebbles, wire and a couple of chipboard pieces. I glued everything with 3D Matte Gel.

To paint my journal I used two shades of Art Alchemy Opal Magic Paints: Rose Gold and Violet Gold.
I also used the Rust Pastes on the metal embellishments to make the project look even more vintage.

Finnaly I used the Black Gesso to paint the chipboard tittle and made some splashes here and there to add a little bit of contrast.

Here is my video with all the process. I hope you will enjoy it :)


*Scroll down on this post to find a full products list


Thank you for visiting
have a lovely crafty day!
xxx
Athanasia


October 28, 2016

My ugly buttons

Hello dear friends!
I'm very excited and thankful to be invited back in Finnabair CT!
I'm looking forward to share my new projects and ideas with Finn's amazing products and I'm sure that it will be a fantastic journey for all of us!
Today I want to share an assemblage I created for Finn's blog with buttons and Art Alchemy Acrylic Paints.


I love collecting cute stuff like keys, coins, gems and alll kinds of
interesting little objects that come my way.
I've been collecting all these buttons for years, some of them are very old and I got them from my grandmother... So, I decided to create something with them.
Even I wasn' t sure how it would turn out, I knew from the beginning that I was going to cover them completely with paints, so I decided to chose all my ugly buttons and kept my favorite ones in the box.

Although it took me ages to find the right place for each one of them, I had so much fun playing - it was really like the 'TETRIS" game! You can watch the whole fun part in my video below :)


I used the 3D Gloss Gel to glue them down to a wooden base and covered everything with Heavy Black Gesso.

The most fun part of the whole process was to paint all these buttons with the Art Alchemy Acrylic Paints!

I really love how all these colors highlight the textures and different designs of the buttons.
I liked the result so much that I decided to add nothing more, even one single embellishment, but the tittle.

I used a chipboard word 'CREATE' and painted it with the White Crackle Texture Paste to add more texture and the Emerald Green Acrylic Paint, my favorite color shade.

To add even more texture to the assemblage I used again the White Crackle Texture Paste on several spots...
As my final touches I made splashes with all the colors shades I used before to color the buttons.
Here is my video with all the fun process. I hope you will enjoy it as much as I did :)


***for supplies list and links visit this post

Thank you for visiting!
Have a lovely crafty day!
xxx
Athanasia

September 26, 2016

Circles and Butterflies create happy thoughts!


Hello dear friends!
Today I'm sharing a new page I created in my Denim Journal
 for Finnabair CT with a video tutorial.

I really love that I can add more and more pages in there and they can be worked out of the journal - it makes my job easier!

For my page I used watercolor paper which I cut to Denim's size. I incorporated the two things I enjoy most having on my journal pages: butterflies and circles.

The circles are the leftovers from a chipboard board I had in my stash and I used my favorite shades of Art Alchemy Acrylic Paints to color them.


In order to create a mixed media background I used Heavy White Gesso with stamps to create texture (you will see this technique in my video below) and Modeling Paste with the Honeycomb Stencil. I also used some clear stamps with black Archival Ink.


The butterfly is handmade and I love this tiny Star Brad I used to decorate it, it's so cute!
For my quote I used a die cut element from the 7Dots Studio Verano Azul collection, as well a sticker with a big star to embellish my page with some black thread.

Last thing to do was to glue three Melange Art Pebbles to add more interest to my page. Luckily I found in the jar the perfect size of pebble to fit the chipboard circles. I love how they look in there!

In the video I made especially for you, you can watch how I put together this journal page.


***you can visit this post for full supplies list with links.

I hope you got some inspiration from toady's project and create your own page in your Denim Journal!

Thank you for visiting
Have a lovely crafty day!
xxx
Athanasia

August 26, 2016

Color your world - mixed media canvases

Hello dear friends!
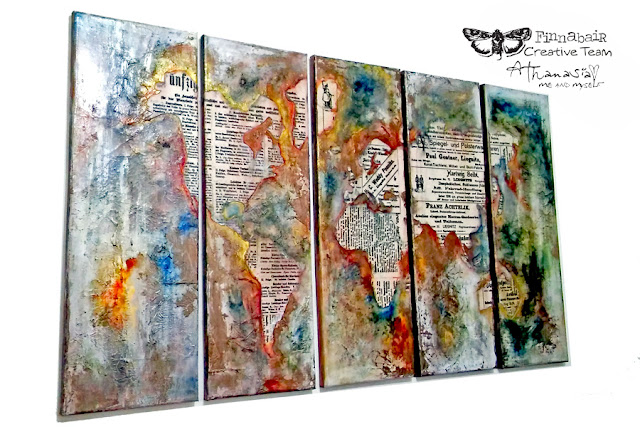
Today I'm sharing a BIG project, the biggest I ever created lol
The whole project measures 1 meter (5 canvases 20x60cm each), it took me many many days to finish it and now I'm very proud it's hanging on my wall :)


I used lots of amazing Finnabair products to create it
- scroll down on Finnabair's blog post here to find the supplies list with links.

I was keeping for a long time two amazing resist canvases, designed by Finnabair, to make something special. 
The time came when I found incidentally on Pinterest some ideas with world map art like wallpapers, digital collages and art pieces. I was very excited, so I decided to make my own piece of art in my own way. 

Here is how I started

1. First I secured the 5 canvases together with masking tape. This made my work much easier in the next steps.

2. Then I cut very carefully with scissors the land pieces of a map that was the same size as my canvases and this way I created a large stencil. I didn't throw away the cut pieces...

3. I used them as masks to create the land for my project. I placed all the pieces one by one on the resist canvases and I draw the outline with a pencil. Then I cut them with scissors and put them aside.

4. When I was done with cutting the land, I placed my handmade stencil on the canvases and put each one of the cut resist canvas pieces in the right place. This was a little tricky as there were too many small pieces especially for the islands, but it helped me to learn some geography lol :)

5. Before I glued down the lands,  I used the Silicon Brush to give  the whole surface a thick layer of Heavy White Gesso  and let it dry. To glue the resist canvas pieces I used the Clear Sculpture Medium - it was really the perfect glue for this work! I let it dry outside for a couple of hours.

6. After it was dry I started working with the sea sections. I used the Clear Sculpture Medium again with napkins. I glued them randomly and wrinkled to create texture. This gave also depth and interest in the finished project. I left it overnight to dry...
((Unfortunately, from this point onward I haven't any more photos of the process to share as I was so captivated with the painting part that I didn't think to take some)


7. The painting part was so fun, it was really worth waiting for... 
I made custom paints with the Soft Matte Gell and Mica Powders and started painting all over the canvaces, here and there, without much thinking. I used mostly the Rust Mica Powder (I love this color), as well as Gold and blue shades of  Frozen Lake and Deep Waters. I also used some similar shades of Primary Elements.


When the first layer of paints was dry, I used a couple of warm colors of Art Alchemy Paints, Pure Sunshine and the Fresh Orange, as well some white acrylic paint to lighten the project.

 I love how all these colors blend together, highlight the texture of paper napkins and contrast the beautiful lands of the resist canvas pieces!


I hope you got inspired from my project.
Thank you for visiting,
have a lovely crafty day!

xxx
Athanasia