Showing posts with label house. Show all posts

April 17, 2020

mini art journal | last pages


Hello dear friends!
Today I'm featuring two lovely artists in my last pages of my mini journal.
I'm so sad that this cute little happy journal has come to it's end and so happy at the same time that I managed to fill all the pages :)

In this particular quarantine period of our life, I spend more time on Pinterest than I did before and I get very excited when I find new -at least for me- artists! Sometimes I like so much their work that I try to make something similar in my journals and that makes me really happy!

For this spread I got inspired by Magaly Ohika and her amazing faces she draws with the cute house on the nose. Her style is unique and I tried to incorporate it in my style.


...

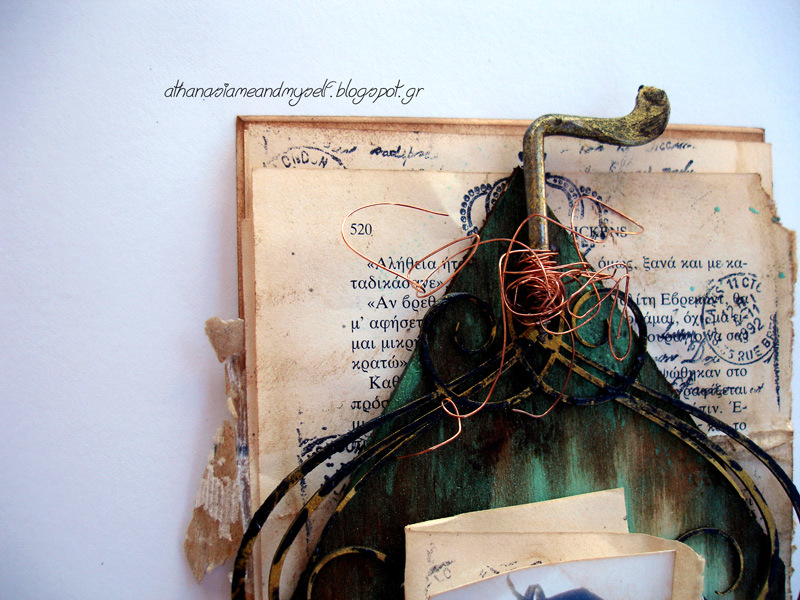
I call the last page of my mini journal 'happy end' and it really is!
I got inspired by Mary 'The Turquoise Paintbrush' and her colorful artworks.
She uses all the colors I love to use in my projects.
I created this page by not having on my mind her work but when I finished and looked at it my mind went on her. I think my page looks like her style, don't you think?


I'm off to find -or make?- a new mini journal to start.
Stay safe and creative!

xxx
Athanasia


March 26, 2020

mini art journal |flying houses |new video


 I'm back today with another page in my mini art journal
with a VIDEO on how I made it.

I hope you like it and enjoy the process as much as I did.
Don't forget to subscribe on my You Tube channel!


Stay Home
stay safe
stay healthy

xxx
Athanasia

June 19, 2016

Tiny roof tiles *video

Hello :)
My new tutorial for ColourArte is here:


I altered these cute tiny roof tiles in order to give them as a gift appreciation to my daughter's teachers. They already have them and both loved them :)

The ColourArte products I used to paint them are:

Primary Elements

All Purpose Clear Glaze Medium 4oz Bottle


I mixed the Primary Elements with the Glaze Medium and made custom waterproof paints.
You can see all the process in my video, I hope you will enjoy it!
Don't forget to leave me a comment, as well give me thumbs up on my You Tube channel!


Thank you for visiting!
Have a lovely crafty day!

xxx
Athanasia


May 29, 2016

tiny canvas #2

Happy Sunday!
Today I’m sharing a tiny canvas I created for ColourArte. It’s really a quick and easy project to do, it only took a few minutes to paint it!
To create this project I used:
ColourArte products
Other products:
  • small canvas 8×7 cm
  • Finnabair Black Gesso
  • Finnabair white crackle paste
  • Finnabair white sand paste
  • Metal embellishments
  • chipboard embellishment (for the roof)
  • wire
  • screws
  • word sticker (7 Dots Studio - Domestic Goddess)
  • package card stock
  • craft glue
First I cut the package chipboard in a house shape and glued it on the back side of the canvas. Then I covered everything with Black Gesso. When it was dry I applied the two texture pastes (crackle and sand paste) here and there. I placed the chipboard and metal embellishments in the wet pastes (they work as a glue) and left it dry naturally for 5 hours.
After it was dry I spread with a dry paintbrush the three colors of the Primary Elements here and there. I sprayed with water and dried it with a heat gun. Then I applied a thin coat of Clear Glazewith a paintbrush to make the Primary Elements permanent.
Next step was to highlight some spots with the Vintage Mint. I applied it with a dry paintbrush here and there. I really love this color because it gives a vintage touch at the project.


Last step of the painting process was to make some splashes with the Siam White H2O. You have to spray some water in the jar to activate the color and wait for a couple of minutes. Then your color is ready to use.


At the end I added two screws and twisted the wire in order to create a hanger for the little canvas. I also glued a sticker with my tittle: ‘Unknown’.
Here are some more closeups…


This is the first tiny canvas I created,
you can see it in this post


Thank you for visiting,

Have a lovely crafty day!

xxx
Athanasia

May 15, 2016

wooden houses

  Happy Sunday dear friends!
Today I'm sharing a fun project I created to decorate my leaving room.
I had so much fun 'building' these cute houses and painting them with ColourArte pigments.

Here are the supplies I used to create them:

ColourArte products


Other products:
  • White Heavy Gesso
  • Black Gesso
  • paintbrush
  • pyrographer
  • sandpaper
  • wood blocks (I used the legs from an old cheap ikea table)
  • jigsaw

The whole idea came when I saw the wooden legs of an old cheap ikea table standing at the corner of our warehouse. They had the perfect size to create some houses. I knew that we weren't going to use this table never again, so with no second thought I cut them in pieces with the jigsaw. I didn't do any measuring, just started cutting in different sizes.
Next thing to do was to use the sand paper to soften the edges and make them look old. 
After that, I used the pyrographer to create the doors and windows. That took a lot of time but it really worth it! If you don't have a pyrographer you can simply use paints to draw doors and windows. 
Then I started painting the houses.

I made my own Glaze paints by mixing in the Clear Glaze Medium my favorite arte-pigment colors. 

Again, no measuring at all, just keep in mind that the more color you add, the more opaque look you get or add more Glaze for Extra Transparency. Just play with the paints and have fun!


I didn't use any container to blend the paints, I just added some Clear Glaze on the corner of the house and spread the pigment in there. It's pretty easy to apply it, the paint is so smooth, I just love it! I kept adding some more pigment here and there and just blending with the paintbrush and when I was happy with the result I let it dry naturally and kept going with the next house and so on...

I used on three of the five houses blue/green shades of Primary Elements pigments and on one house the Fuzzy Peach shade. I also painted two houses with White Heavy Gesso and all the roofs with Black Gesso.

Last and very important step for me was to sand all the edges of the houses with sandpaper, to create an aged look. I also used it on all the sides of the houses to remove most of the gloss of the paints.

I really love the result, they are already standing on my shelf :)
***you can find all ColourArte products here 

Thank you for visiting,
have a lovely crafty day!

xxx
Athanasia

September 20, 2015

Finally I understand...

Hello everyone!
Today we have a new Creative Gym at Mixed Media Place:

Proverbs and Sayings

You may create any type of art inspired by proverb or saying. 
From cards to layouts, altered art and journal pages... be free and create some art!

Here is my project


'Finally I understand little things are the most important in life'. 
I chose this simple but very important for me quote, because it represents what I'm trying to do in my life this period. 


I wanted to place the photo with the quote on a house. Don't ask me why, I just had this vision. Maybe the house is the symbol of the enduring values of our life. So, I took a piece of balsa wood and cut a house shape with my scissors. I painted the edges with the Gathered Twig Distress Stain and the rest of it with the Celedon Silk.


 To alter the chipboard pieces I used the Honey Amber silk and Black Heavy gesso. I glued them on the painted house, then I glued the photo with a folded old paper and last the metal embellishments.


Finally I glued the hole composition on some stamped pages from an old book and all these on a cardboard in the same size. The last thing to do was to wrap a twine all around the project.

***You can find all products at Mixed Media Place store

So, I'm looking forward to see your projects for our challenge.
If you want more inspiration please visit the MMP blog to see what created the rest of the ladies.

 >>>

With this project I'm entering the September challenge at Colorful World with this beautiful moodboard. I got inspired by the wood and the colors.


>>>

Thank you for visiting!
Have a lovely crafty day!