Showing posts with label Studio Calico. Show all posts

October 14, 2016

VIDEO HOP - join the fun to win ColourArte products!!!

Hello dear friends and welcome back to my blog!
Today I'm sharing my project with a video tutorial I created for the 
ColourArte VIDEO HOP!


ColourArte proudly welcomes you to the very first #ColourArteVideoHop
Please see the OFFICIAL GIVEAWAY RULES BELOW to find out 
how you can win our 14 Prizes!!!
 After you have viewed this video and entered the contest, click on the first video link below. This will take you to the next designer’s video. Continue to click on the FIRST link after watching each video. When you return to the first video you will know that you have maneuvered through all of the video hop.

Athanasia Papantoniou https://youtu.be/eO3hYOx3evQkar (you are here)
Barbara Rankin https://youtu.be/HgK-eMWx1no 
Cindy Porter https://youtu.be/lEWMYQOGE9s
Daniela Rogall https://youtu.be/sweWM0iK6P0
Karolina Bukowska https://youtu.be/AymBUCh1o6I
Kasia Bogatko-Skoczypiec https://youtu.be/a16Ya1HMhqM
Linda Ann Smith https://youtu.be/EK7ZweMNHO0
Maria Fondler-Grossbaum https://youtu.be/bGWZ9_c8sAc
Kripa Koushik https://youtu.be/zdNC3VDlY0g
Vicki Louise Neil Ross https://youtu.be/9NhyzRgWes0
Yasmina Tin Sang https://youtu.be/kF6vYnrleQw
Yva LovĂ©e Barbour https://youtu.be/Jta9z3s6heM
Elena Lishchenko https://youtu.be/HFtGRuWMkm4
Arantzazu Sangrador https://youtu.be/nFNZ8jkbQ9U 


OFFICIAL GIVEAWAY RULES: 

1. To enter post a comment on the video. You are welcome to comment more than once, but only your first comment will serve as the contest entry. You have 14 opportunities to enter since there are 14 designers participating in this hop.

2. Winners will be chosen by random drawings and posted on ColourArte.com and https://www.facebook.com/groups/colou... on Tuesday, October 24, 2016.

3. One prize will be given for each designer’s video consisting of the following Vivid products: 4 one-ounce bottles of Vivid color and 1 one-ounce bottle of true metals. (Estimated value 38.00 plus shipping) 
4. Winners have 48 hours from the time the announcement is posted to claim the prize and provide their mailing address, or the prize will be forfeited and a new winner will be drawn. 
5. The giveaway is open internationally, except where prohibited by law, and all entrants must be 18 years of age (or older) to participate. 
6. The contest ends on October 21, 2016, Midnight, CDT


Here is my video. I hope you will enjoy it and get inspired! 
Don't forget to leave me a comment, 
as well give me thumbs up and subscribe on my You Tube channel  :)


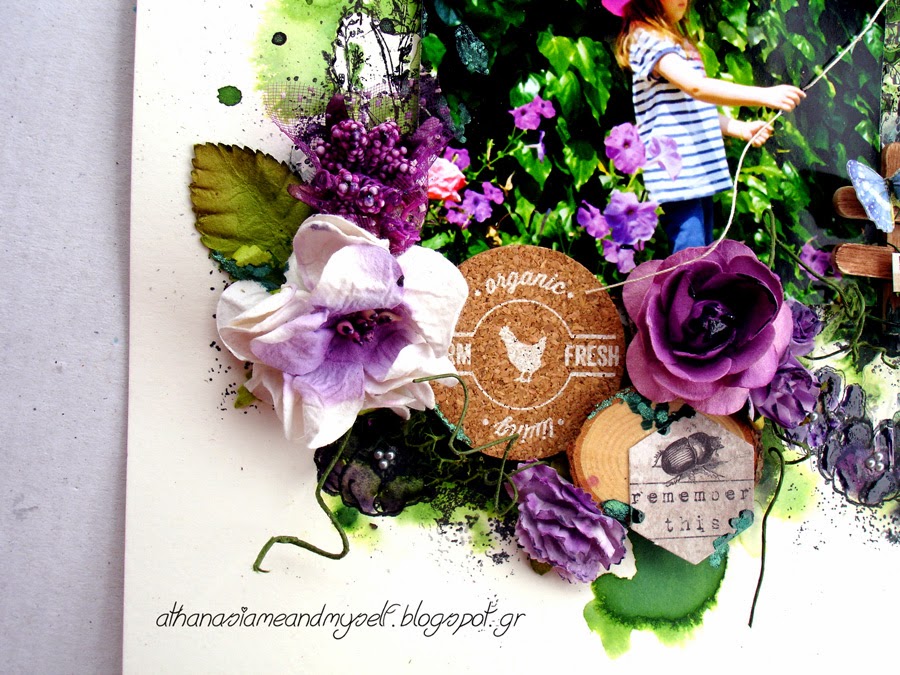
For my tiny canvas I used:
ColourArte Radiant Gels: Autumn Leaf, Spiced Pumpkin, Copper Pearl
ColourArte Primary Elements: Autumn Leaf
Finnabair Art Stones
Finnabair Mini Art Stones
Finnabair Black Gesso
Studio Calico sticker
wire
canvas 8x8cm (3,1x3,1 inch)


So, I wish you all happy hopping and good luck with the prizes!!!

Thank you for visiting,
have a lovely crafty day!

xxx
Athanasia


June 14, 2015

piece by piece

Hello mixed media friends!
 Today I'm hosting the Mixed Media Place. I created a small 12x17cm canvas I made for my art wall. It's already hanging there in a frame :) 


To create this project I started making a collage with tiny pieces of paper and chipboard pattern. I applied clear gesso all over the surface and started playing with stencils and stamps. 
I used the 'Weaving' Prima Elementals stencil with the light paste to give some dimension to the background. I also aded Lindys Stamp Gang embossing powders for more texture. 


Then I had some fun with the colors:  I made some splashes with the Lindy's Stamp Gang Opal Sea Oats and Dark Chocolate Truffle sprays and spread some Blue Grass Primary Elements on several spots.


I also used my permanent pen to draw some details like the fish at the photo below...
Finally I stamped with a few stamps here and there, spread some Copper Glass Glitter and wrote my tittle with alpha stickers from 7 Dots Studio Domestic Goddess collection and an alpha stamp.


***all supplies list on this post

>>>
With this project I'm playing at...
Scrapki- Wyzwaniowo : Damask challenge 
I used a chipboard piece with this pattern, cut it in small pieces and glued them here and there on the page.


Kiev Skrapklub challenge


>>>

Thank you for visitig,
have a lovely crafty day!


April 15, 2015

create art

Hello dear friends!
Today I'm sharing my page for our watercolor challenge at Scraps N Pieces with a start to finish VIDEO - I hope you will enjoy my work :)


 This month's mood board is absolutely gorgeous, made by Melenia Agapides.
The challenge is about water colors - you can use on your project any water based color, like mists, inks and of course water colors. Get inspired by the moodboard in any way you like, use the colors, the pictures, or the quote...


I'm not going to say much for my project today.
You can watch the video and learn how I created it!
Here are some details...


...and here is the VIDEO as I promised :)


>>>

With this page I'm entering the following challenges:
Scrappolis challenge: I used a pin on the butterfly

Volga-Scrapbookspitfire-thorns

>>>

I hope I'll see your watercolor creations at Scraps N Pieces !!!
Until next time,
Have fun!

April 10, 2015

Color your world #2

 Hello dear friends!
Today I'm sharsharing the second project for the April color challenge at Lindy's Stamp Gang. I decided for this month to create three projects with the same title 'color your world', because of the pallet with all these beautiful and bright colors!
 So this is my #2 (you can see #1 project here).
For this project I used a very colorful photo I found on Web and the April 2015 Color Challenge MEGA Set.

First I applied some light paste with a mask and spread some Sunset Yellow embossing powder directly on it - believe me, it works perfectly that way! After heating it with the heat gun, I repeated the same process with another mask and the Tilt A Wheel Teal embossing powder and heated it again. Then, I made some splashes with all the sprays, I stamped a few stamps and that was all for the background!

I also used one of the sprays, the Magnolia Magneta Gold,  to watercolor the stamped flowers with a paint brush. It is really a pretty easy and fun way to use the sprays and believe me, you will love the result!


One other fun thing I did, was to draw with a permanent pen some funky flowers around the tiny spots of the splashes. I love how they turned!

I also draw some leaves on the top and the bottom of the page, which I panted with the Oakleaf Olive spray...

 Now let me tell you how I created the tittle. I used all the embossing powders of the set on the chipboard letters: while I was holding the chipboard letter with a nipper I poured some powder on the upper half and another color on the lower half. I dried it with the heat gun and at the end I did some doodling with the permanent pen. Really fun process, don't you think?

>>>

With this project I'm entering the
 'Color Your World' challenge at Our Creative Corner.

And My-Scrap.Ru sketch challenge:


>>>

That was all for today. I hope you got some inspiration from my 'Color your world' #2 project.
Thank you for visiting, have a wonderful crafty time!


March 26, 2015

Just go...

Hello dear friends! 
Today I'm sharing a layout for Lindy's Stamp Gang
Once again, I was inspired by the amazing moodboard of the March Color Challenge with all these beautiful party balloons, so I decided to make some by myself on my page. You can see me drawing these balloons and all the process step by step - I hope you will enjoy the video!


 For this page I used the March 2015 Limited Edition Spray Set plus the Frozen Jack Frost StarburstMadonna Robe Blue Gold and Geranium Coral Blush embossing powders.


To make the background I used the sprays with some water and watercolors. I also used several colors of inks with stamps.

I used the embossing powders to alter the chipboard pieces - actually they are chipboard leftovers and I love adding them in my projects.

As you can see, in this project I didn't use a lot of embellishments because I wanted to focus on the background. I really love using different media in order to create an interesting background and that' s why I used a white card stock as a base.


To create the balloons I used a permanent pen, a pencil, the spray set and watercolors. To make them more real I glued some thread under each of them. I had really fun time drawing and painting them and I love how they look!


Here is my video, I hope you will enjoy the process!


>>>

With this layout I'm joining the challenge #10 Birds of a Feather at The Mixed Media Monthly Challenge where we have to create something that reminds birds. Well, I included two wood veneer birds in the composition and a ticket with a bird. I also combined the idea of a flying bird with the balloons - how awesome would it be to hang over those balloons and just go up to the sky and travel all over the world!
>>>


Thank you for visiting, have a wonderful crafty time!


March 24, 2015

Be adventurous

Hello dear friends! 
Spring is here and I'm in a great mood these days - I want to make colorful projects and paint a lot of flowers and butterflies!  As I was looking in my photo files, I found a beautiful one with my daughter we took about 2 years ago at the summer house. So, I decided that it was the perfect photo to make a layout about Spring time and today that I'm hosting the Mixed Media Place blog I can share it.


For this project I used two shades of colors: greens and purples. I tried to match the colors of the mediums with the colors of the photo and I think I found the perfect shades in the Lindy's Gang Stamp sprays. I used the Starbursts Salt Water Taffy and Jazzy Jivin' Purple to color all the flowers (paper and stamped ones) and the Starbursts Frolic in the Forest and Ponderosa Pines Olive  to make the background.


In order to make the background, I used a flourish stencil with white gesso. After it was dry, I made A LOT of splashes with the LSG sprays. I also used the Deep Green Ecoline on some spots and a few stamps with the black Staz On. I really enjoy doing such techniques, especially the splashing is my favorite one!
If you want to see how I created the background, you can watch this video of mine - it's a similar project with the same techniques!

The next thing to do, was to deal with the photo. Because of Maria's pose, I got excited by this idea to put her hold something like a kite. She actually didn't hold anything, I don't even remember what she was doing at that moment. Anyway, at first I was going for a kite, but then I found these big butterflies in my stash and that was it! To make it more realistic I made two tiny holes on and under her hand and put the thread through them. It's like she is holding the thread for real, don't you think?
I also made a loop around the head of the butterfly, because she caught it with her lasso :)

To give more depth to the background I glued a few embellishments and some flowers under the photo. I painted them in the same shades with the flowers of the photo with the sprays, but that wasn't enough for me. So, I decided to make a small fence with some wooden sticks and green wire. I really like how it turned. This fence was the perfect place to put the title of the composition "Be Adventurous' - it's a sticker I got from the 7 Dots Studio Nature Walk collection.


***You can find all the supplies used on this project at Mixed Media Place store
and their links on this post.

>>>
With this project I'm entering the following challenges:


I wish they would be real all these beautiful flowers, so I could smell them :)


Scrapogoliki sketch challenge with this beautiful sketch:


ScrappolisButterfly challenge

>>>


I hope you got some inspiration by my Spring mood! 
Thank you for visiting,
Have a wonderful crafty day!